How to Create Animated Cards with WebGL and Three.js
📣 Sponsor
Recently, Apple started rolling out attractive and animated cards on Apple Music. Animations and effects like this really drive engagement with websites, and ultimately lead to more conversions.
I thought this was a pretty cool way to present cards, which are becoming a more prevalent way to display content on the web. This tutorial will cover the important points to master this effect.
Step 1. Three.JS
As with a lot of tutorials I do on WebGL, we will be using Three.JS to achieve this effect. The process we will be using looks a bit like this:
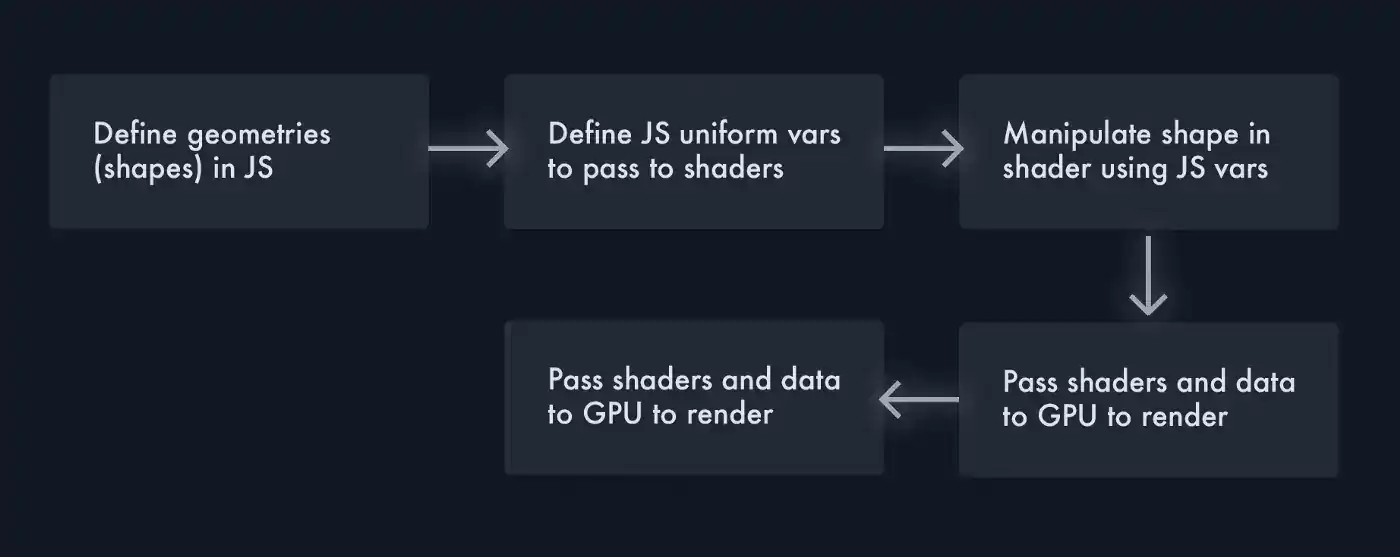
Once we import Three.js, we set everything up in JS. The key thing to note here are the uniform variables which can be changed and immediately lead to changes in the WebGL rendering.
    // Create a plane, and pass that through to our shaders
    let geometry = new THREE.PlaneGeometry(600, 600, 100, 100);
    let material = new THREE.ShaderMaterial({
        // These uniform variables can be adjusted in JS and are passed into the shader
        // After that they are passed into the GPU and rendered. You can alter these values
        // and change them through the mesh i.e. mesh.material.uniforms.u_height.value = x
        uniforms: {
            u_lowColor: {type: 'v3', value: low },
            u_highColor: {type: 'v3', value: high },
            u_time: {type: 'f', value: 0},
            u_height: {type: 'f', value: 1},
            u_rand: {type: 'f', value: new THREE.Vector2(randomInteger(6, 10), randomInteger(8, 10)) }
        },
        // These two are links to our fragment and vertex shaders
        // See full code for more details
        fragmentShader: noise + fragment,
        vertexShader: noise + vertex,
    });

    // Create the mesh and position appropriately
    let mesh = new THREE.Mesh(geometry, material);
    mesh.position.set(0, 0, -300);
    scene.add(mesh);
Step 2. Shaders
In our code we currently have a flat sheet which will just appear as a flat sheet when we load it up in our browser. That sheet is made up of a number of vertices, which was also decided upon in our Javascript (vertices is one of the arguments when we create our geometry). Shaders adjust shapes we created in our Javascript at every vertex, and are written in a language similar to C.
To create the folding effect, we need to change the sheet to bend and fold over itself. We also need to adjust the color so certain parts of the sheet are darker than others. Since we can update variables passed to the shaders, we can add custom hover effects.
There are only two types of shaders in WebGL — vertex and fragment, which control position and color respectively. For our vertex shader, we will adjust the point along the z-axis, so it rises up at certain points and folds like a sheet. We will also add some random positioning to the x and y-axis, using noise.
    vDistortion = snoise(vUv.xx * 3. - vec2(u_time / u_rand.x, u_time / u_rand.x) + cos(vUv.yy) * u_rand.y) * u_height;
    xDistortion = snoise(vUv.xx * 1.) * u_height * u_rand.x / 10.;
    vec3 pos = position;
    pos.z += (vDistortion * 55.);
    pos.x += (xDistortion * 55.);
    pos.y += (sin(vUv.y) * 55.);

    gl_Position = projectionMatrix * modelViewMatrix * vec4(pos, 1.0);
vUv refers to the position of the vertex, so vUv.x is [x], vUv.xx is [x, x], etc.
For our fragment shader, we will be mixing the low and high colors we defined in Javascript, and displaying them based on the z-axis shift we created in our vertex shader using the mix() function.
    vec3 highColor = rgb(u_highColor.r, u_highColor.g, u_highColor.b);

    vec3 colorMap = rgb(u_lowColor.r, u_lowColor.g, u_lowColor.b);

    colorMap = mix(colorMap, highColor, vDistortion);

    gl_FragColor = vec4(colorMap, 1.);
Step 3. Carousel
We want our carousel to be both scrollable, and draggable. For that we need to engage 4 different types of events:
- pointerdown — user has clicked on the carousel
- pointerup — user has finished dragging
- pointermove — user is dragging the carousel
- wheel — user is scrolling in the carousel
Complete!
The full code can be viewed through the links below. Through this tutorial it’s easy to see how you can start to leverage WebGL to make your latest projects more interactive. Hope you’ve enjoyed this tutorial, and see below to get the source code:
More Tips and Tricks for CSS
- Multi colored text in CSS
- How to make a child element appear behind its parent in CSS
- The Quick Guide to Dark Mode
- CSS Colors
- Creating a Javascript Drawing and Annotation Application
- CSS Glass Morphism Generator
- CSS Transitions
- CSS Introduction
- CSS Positioning
- How to make a div the same height as the browser window