Sticky Positioning with CSS
📣 Sponsor
I've recently seen position: sticky a lot more in the wild. The difference between sticky and fixed in CSS has always sort of baffled me, since I only ever took a superficial interest in it. After trying it out, however, I've found sticky to be incredibly useful.
Sticky elements essentially stay positioned exactly where they are, until we scroll past them. When we do, they'll become stuck to the viewport, until you scroll past their container, at which point they will stop scrolling. It works like any other CSS positioning, i.e.:
.el {
    position: sticky;
    top: 10px;
}
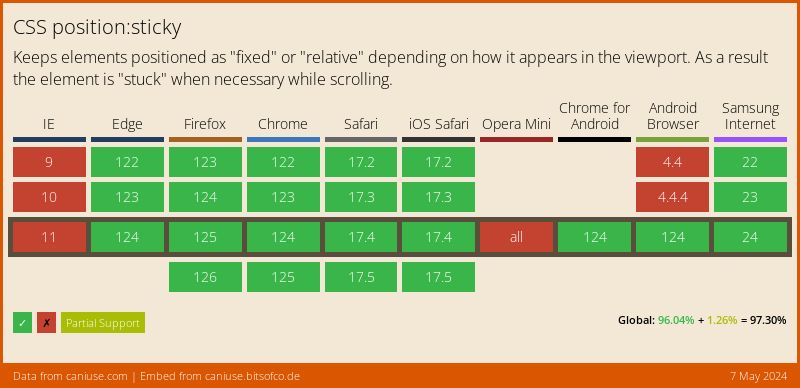
Support is also better than you'd think, with 95% of users being able to view sticky either with or without a prefix, according to Caniuse.com:
An Example
If you're using one of the above supported browsers, then the above example should scroll only as far as the container as you scroll. This differs from using fixed, since fixed is always positioned according to the viewport.
As you scroll past the box above, the text 'I am sticky' should follow you, until reaching the bottom of its container, after which it will stop. The code to make that work is CSS only and looks like this:
.sticky-box {
    width: 250px;
    height: 350px;
    background: rgb(77 85 109 / 10%);
}
.sticky-element {
    position: sticky;
    top: 10px;
}
This is really cool, since this would have required Javascript before to work. We can now accomplish these things with just CSS. It also works for horizontal scrolling, as you might expect.
Real Life Examples
There are a bunch of use cases where this is useful, and perhaps one of the nicest is a menu that only follows you for a little while before disappearing as you get further down the page.
The below codepen demo is CSS only, and gives you a menu which follows you for a short while, before disappearing. If the user scrolls back up, it reappears, like magic.
I have to say, being able to build these things without Javascript makes life a whole lot easier. Let's hope we continue to see this quick CSS changes that give us so much more flexibility when building products and websites.
To learn more about CSS, check out our full guide here, or our other articles here.
