Putting Javascript in Your CSS with Paint Worklets
📣 Sponsor
Putting CSS in Javascript is pretty much the norm these days - but what if we could do the opposite? Recently, I've been reading quite a bit about Houdini, which gives developers the ability to directly interact with the CSS Object Model.
One of the coolest things about it, is that it lets us put Javascript in our CSS. In the example below, I've created a background effect where the Javascript is inside the CSS. Every time you refresh, the background is randomized. Check the CSS tab below to see Javascript inside the CSS.
You can even use CSS variables directly in your Javascript code, letting you use standard colors and other settings you configured in your stylesheet.
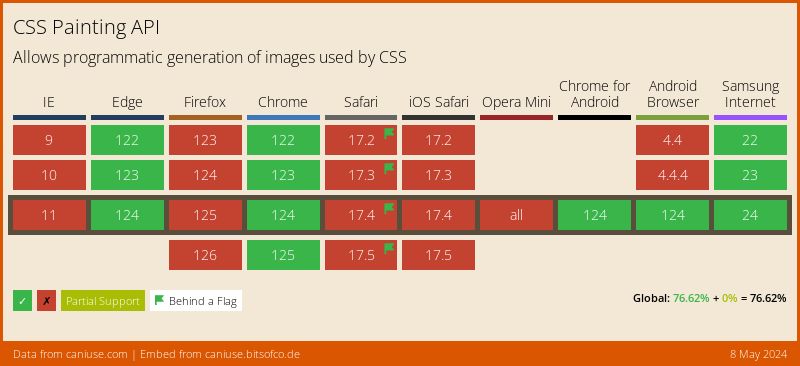
Support for Paint Worklets
As of now, these features only work in Google Chrome and Edge, and a few other browsers - so make sure you are using one of them when trying out the demo below.
Demo
Class name changes
Whenever you change the class of an element, the Javascript inside the CSS re-renders, meaning simply adding classes to an element can recreate complicated effects using different colors, as shown above! When you click on one of the options like Red/Blue - the only thing that changes is the class name of the div.
What are Paint Worklets?
Paint worklets are a way to create images for your CSS using techniques familiar to you if you've used HTML canvas before. We can register custom CSS Paint Worklets by putting our worklet into a file and using the following line:
CSS.paintWorklet.addModule('paint-worklet.js');
We can then use these paint worklets directly in our CSS using the paint() function. Before we get to that, let's look at how we can create our paint-worklet.js file.
How to Create a Paint Worklet File in Javascript
Let's create a basic paint worklet. Our paint worklet file will be called paint-worklet.js. It will contain a class which we register using the registerPaint function. Ultimately, the class will work like any other Javascript class - but the paint() function within the class is what will run to generate the image.
The paint() function has three arguments:
ctx- acts as a canvas context, with all the normal canvas functions.geom- contains information on the CSS element being painted upon, such as width and height.properties- contains additional information on CSS properties which we can register separately.
Below, we will create our class, called BackgroundCanvas. The code I've written below then paints random circles on the canvas, which are of random size and vary in terms of how blurred they are.
Within this function are various configurable options, such as count, blur, and radius, which lets us adjust how the effect will be rendered.
class BackgroundCanvas {
    rand(min, max) {
        return Math.random() * ( max - min ) + min;
    }
    paint(ctx, geom, properties) {
        // Colors for background gradient
        let backgroundColors = [ '#000', '#000' ];
        // Colors for the circle colours
        let colors = [ '#202bc5', '#cc3d44' ];
        // Number of circles to render
        let count = 200;
        // The range of blur and radius values
        let blur = [ 10, 100 ]; // Min, Max blur
        let radius = [ 1, 40 ]; // Min, max radius
        // Clear out the entire canvas
        ctx.clearRect( 0, 0, geom.width, geom.height );
        // And use a blend mode to make the effect look cooler
        ctx.globalCompositeOperation = 'lighter';

        // Apply the background gradient
        let grd = ctx.createLinearGradient(0, geom.height, geom.width, 0);
        grd.addColorStop(0, backgroundColors[0]);
        grd.addColorStop(1, backgroundColors[1]);
        ctx.fillStyle = grd;
        // Fill the rectangle with the gradient
        ctx.fillRect(0, 0, geom.width, geom.height);

        // Then draw a circle for each value of count
        while(count--) {

            // Determine a random x, y, blur, and radius
            let thisRadius = this.rand( radius[0], radius[1] );
            let thisBlur = this.rand( blur[0], blur[1] );
            let x = this.rand( -100, geom.width + 100 );
            let y = this.rand( -100, geom.height + 100 );

            // Draw the circle, using the color, blur, and radius we defined
            ctx.beginPath();
            ctx.filter = `blur(${thisBlur}px)`;
            let grd = ctx.createLinearGradient(x - thisRadius / 2, y - thisRadius / 2, x + thisRadius, y + thisRadius);
            grd.addColorStop(0, colors[0]);
            grd.addColorStop(1, colors[1]);
            ctx.fillStyle = grd;
            ctx.arc( x, y, thisRadius, 0, Math.PI * 2 );
            ctx.closePath();
            ctx.fill();
        }
    }
}

// Register the class 'BackgroundClass' as being called 'BackgroundCanvas'
registerPaint('BackgroundCanvas', BackgroundCanvas);
To register this paint module, add the following Javascript to your HTML document:
<script>
CSS.paintWorklet.addModule('paint-worklet.js');
</script>
How to use a Paint Module in CSS
Now we've registered our paint module, we can call it in our CSS to produce our background effect. Since we called our paint module BackgroundCanvas, adding it to our CSS looks like this:
#paint {
    background: paint(BackgroundCanvasInline);
}
Now our canvas code which we wrote above will run on the #paint div, giving it the background demonstrated in the CodePen at the top of this article.
Putting Javascript in your CSS
Now that we've covered how paint modules work, let's look at how we can put Javascript directly in our CSS. One of the benefits of this is that we end up with Javascript directly configurable from CSS variables. As I mentioned, our Javascript will re-render whenever we change the classes of an element. So we can have different classes with different CSS variable settings, allowing us to change the Javascript by simply changing our CSS.
#paint.red {
    --circleColorOne: "red";
    --circleColorTwo: "blue";
    --number: 200;
}
#paint.green {
    --circleColorOne: "#0054ff";
    --circleColorTwo: "#7fe427";
    --number: 250;
}
#paint.default {
    --circleColorOne: "#202bc5";
    --circleColorTwo: "#cc3d44";
}
#paint {
    --number: 300;
    --minBlur: 10;
    --maxBlur: 100;
    --minRadius: 1;
    --maxRadius: 40;
    --backgroundEffect: {
        let backgroundColors = [ '#000', '#000' ];
        let colors = [ var(--circleColorOne), var(--circleColorTwo) ];
        let count = var(--number);
        let blur = [ var(--minBlur), var(--maxBlur) ];
        let radius = [ var(--minRadius), var(--maxRadius) ];
        ctx.clearRect( 0, 0, geom.width, geom.height );
        ctx.globalCompositeOperation = 'lighter';
        let grd = ctx.createLinearGradient(0, geom.height, geom.width, 0);
        grd.addColorStop(0, backgroundColors[0]);
        grd.addColorStop(1, backgroundColors[1]);
        ctx.fillStyle = grd;
        ctx.fillRect(0, 0, geom.width, geom.height);

        while(count--) {
            let thisRadius = rand( radius[0], radius[1] );
            let thisBlur = rand( blur[0], blur[1] ),
                x = rand( -100, geom.width + 100 ),
                y = rand( -100, geom.height + 100 );

            ctx.beginPath();
            ctx.filter = `blur(${thisBlur}px)`;
            let grd = ctx.createLinearGradient(x - thisRadius / 2, y - thisRadius / 2, x + thisRadius, y + thisRadius);
            grd.addColorStop(0, colors[0]);
            grd.addColorStop(1, colors[1]);
            ctx.fillStyle = grd;
            ctx.arc( x, y, thisRadius, 0, Math.PI * 2 );
            ctx.closePath();
            ctx.fill();
        }
    };
    background: paint(BackgroundCanvasInline);
    padding: 2rem;
    font-family: -apple-system, Inter, BlinkMacSystemFont, 'Segoe UI', Roboto, Oxygen, Ubuntu, Cantarell, 'Open Sans', 'Helvetica Neue', sans-serif;
    border-radius: 4px;
    color: white;
    border-radius: 14px;
    font-weight: 900;
    font-size: 2rem;
    max-width: 600px;
    height: 400px;
}
So that means you can change the blur, radius, color, and number of circles by just updating your CSS variables. We just have to update our paint-worklet.js file to execute our CSS. Our new paint-worklet.js looks like this:
class BackgroundCanvasInline {
    static get inputProperties() {
        return ['--backgroundEffect'];
    }
    rand(min, max) {
        return Math.random() * ( max - min ) + min;
    }
    paint(ctx, geom, properties) {
        let parseCss = new Function('ctx', 'geom', 'rand', properties.get('--backgroundEffect').toString());
        parseCss(ctx, geom, this.rand);
    }
}

registerPaint('BackgroundCanvasInline', BackgroundCanvasInline);
Notice that we can get our variable --backgroundEffect using the static get method. Then we execute our function using the new Function notation, passing in the appropriate arguments.
Why put Javascript in your CSS?
Adding Javascript into your CSS is pretty awesome - which is a good enough reason, but the main benefit being is you can keep all of your variables for color, size, and visual appearance of canvas elements directly stored in your CSS with CSS Variables.
Using new Function() obviously has security implications - however paint worklets are pretty limited in functionality and lack a globalThis/window object, or even fetch functionality. As such, the risk is minimal. I would still advise, however, that it is better practice to keep your Javascript directly in the worklet itself, rather than in CSS.
In any case, this application of paint worklets directly in CSS is an exciting way to render canvas-like functionality in CSS, and it's pretty cool to be able to dynamically use your CSS variables in Javascript. The full code for this article can be found on CodePen via this link. If you've enjoyed this article, follow me on twitter for more dev content.
More Tips and Tricks for CSS
- The Quick Guide to Dark Mode
- How to disable text selection in CSS
- Making 3D CSS Flippable Cards
- CSS 3d Mosaic Parallax Effect
- Using Only CSS to Recreate Windows 98
- CSS Only Masonry Layouts with Grid
- CSS Positioning
- How to make a child element appear behind its parent in CSS
- CSS Pseudo Elements
- What are Variable Fonts in CSS, and How to Use Them