Art Generator with Javascript and WebGL
📣 Sponsor
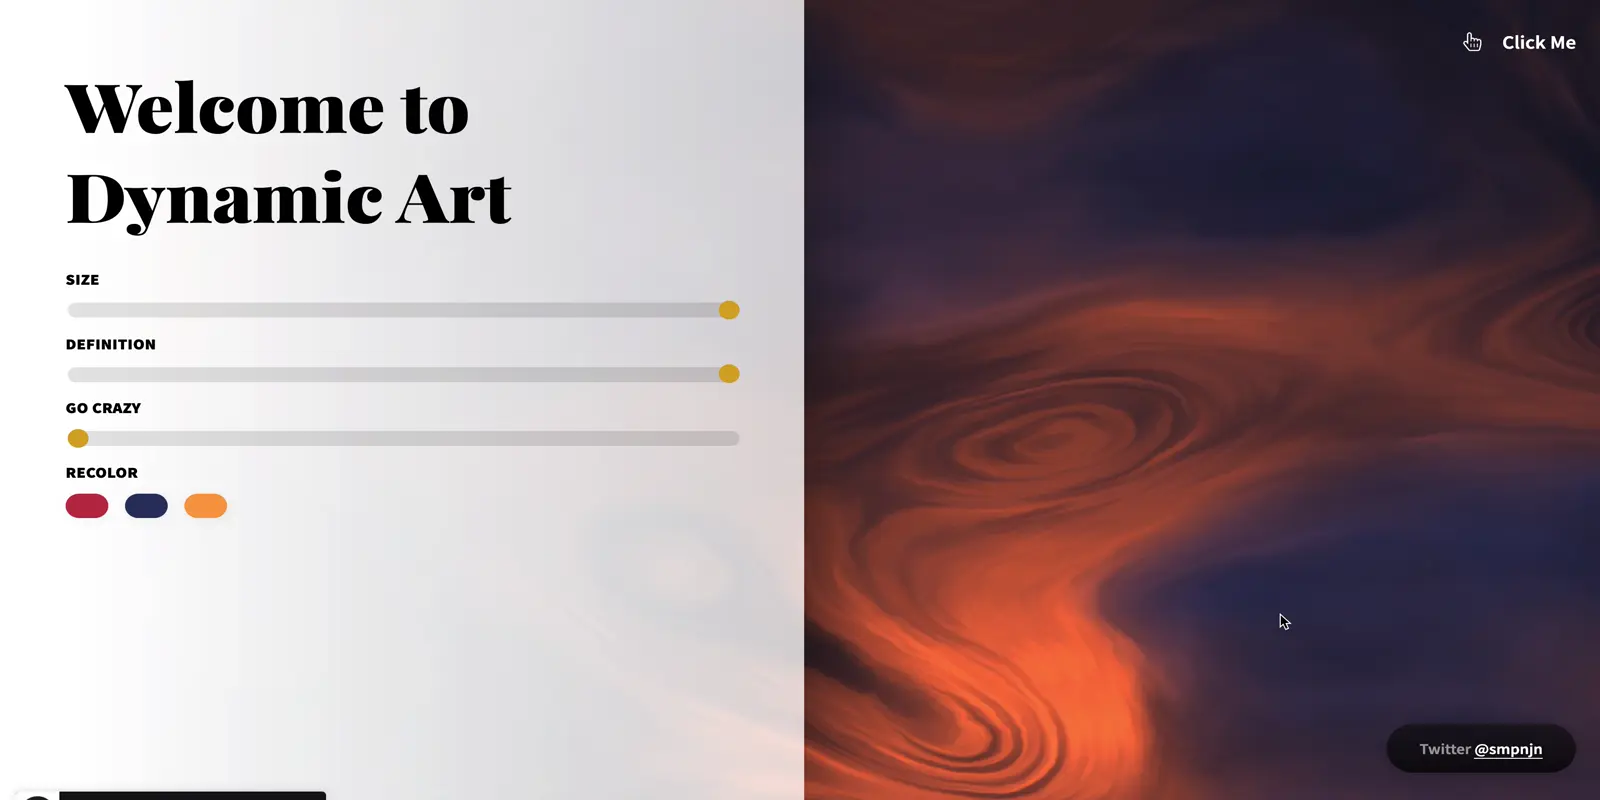
Modern web design often makes use of large introduction images. These large images frame a product or service at the top of the website.
This got me thinking of how we could use WebGL to make an art effect similar to The Starry Night by Van Gogh. What I created was something similar, which nicely transforms into liquid if you want it to.
See the Pen Dynamic Art by smpnjn (@smpnjn) on CodePen.
Step 1. Three.JS
Three.js is a Javascript library which allows you to create WebGL 3d objects with ease. To accomplish our effect we will be following a few key steps:
- 1. Create the geometry (shape) with Three.JS
- 2. Render this onto a HTML5 canvas
- 3. Pass this geometry data to shaders
- 4. Animate this using Javascript
- 5. Manipulate the geometry with the shaders
So with that in mind, lets take a look at a snippet of our Javascript, which covers the first 3 points.
    // Please view github or codepen demo for entire code
    const noise = await loader('./shaders/noise.glsl');
    const fragment = await loader('./shaders/fragment.glsl');
    const vertex = await loader('./shaders/vertex.glsl');

    const renderer = new THREE.WebGLRenderer({
        powerPreference: "high-performance",
        antialias: true,
        alpha: true,
        canvas: canvas // canvas is the Id for our HTML5 canvas. Remove this line and Three will auto create a canvas.
    });

    // Get el width and height
    let elWidth = window.innerWidth;
    let elHeight = window.innerHeight

    // Set sizes and set scene/camera
    renderer.setSize( elWidth, elHeight );
    document.body.appendChild( renderer.domElement )
    renderer.setPixelRatio( elWidth/elHeight );
    const scene = new THREE.Scene();
    const camera = new THREE.PerspectiveCamera( 75, elWidth / elHeight, 0.1, 1000 );

    let i = 2;
    // Check on colors to use
    let high = config.colors[i].high;
    let low = config.colors[i].low;

    // Create a plane, and pass that through to our shaders
    let geometry = new THREE.PlaneGeometry(600, 600, 100, 100);
    let material = new THREE.ShaderMaterial({
        uniforms: {
            // All of these variables are passed to our shaders
            // which are then passed to the GPU
            u_lowColor: {type: 'v3', value: low },
            u_highColor: {type: 'v3', value: high },
            u_time: {type: 'f', value: 0},
            u_resolution: {type: 'v2', value: new THREE.Vector2(elWidth, elHeight) },
            u_mouse: {type: 'v2', value: new THREE.Vector2(0, 0) },
            u_height: {type: 'f', value: 1},
            u_manipulate: {type: 'f', value: 1 },
            u_veinDefinition: {type: 'f', value: 20 },
            u_goCrazy: { type: 't', value: 1 },
            u_inputTexture: {type: 't', value: lion},
            u_scale: {type: 'f', value: 0.85 },
            u_clickLength: { type: 'f', value: 1},
            u_rand: { type: 'f', value: randomInteger(0, 10) },
            u_rand: {type: 'f', value: new THREE.Vector2(randomInteger(6, 10), randomInteger(8, 10)) }
        },
        fragmentShader: noise + fragment,
        vertexShader: noise + vertex,
    });
    // Create the mesh and position appropriately
    let mesh = new THREE.Mesh(geometry, material);
    mesh.position.set(0, 0, -300);
    scene.add(mesh);

    // This function when run will animate the renderer
    // Meaning for every animation frame the 3d model
    // will be rerendered onto the canvas.
    const animate = function () {
        requestAnimationFrame( animate );
        renderer.render( scene, camera );
        document.body.appendChild(renderer.domElement);
        mesh.material.uniforms.u_time.value = t;
        if(t < 10 && backtrack == false) {
            t = t + 0.005;
        } else {
            backtrack = true;
            t = t - 0.005;
            if(t < 0) {
                backtrack = false;
            }
        }
    };
I haven't included all the details, but here are some of the key points:
- The uniform variables in uniforms: {} are passe directly to the shader code we will write. When we update these, it will allow us to live update our 3d object.
- The shaders locations are mentioned in the ShaderMaterial() function
- We then request an animation frame to re-render the 3d object. Notice in the animate() function we increase t (time) and the uniform variable, creating the animation
Step 2. Shaders
If you are unfamiliar with what shaders are, they essentially allow you to manipulate the color of a geometry and the position of a geometry. There are two types of shaders, fragments (for colors) and vertex (for positions). These alter the shape before it is rendered.
For this tutorial our main focus is the fragment shader. We will be using noise to generate the liquid effect, and the specific noise we will be using is called fractal brownian noise (FBM). An example of the noise created by FBM is shown below:
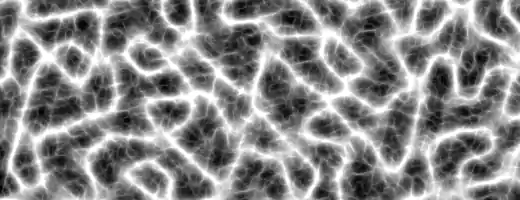
Don't worry, you don't need to know how to create these noise effects, and in fact one won an oscar. The full code for these noise functions are available online and you can find them in the GitHub Repo in the shaders/ folder.
Our vertex shader is the default vertex shader, but our see the code below to see how the fragment shader works:
// Main function
void main() {
    // We have to adjust the effect to fit our resolution.
    // Heavily modified FBM function from https://thebookofshaders.com/13/
    vec2 res = (gl_FragCoord.xy + 100.) / (u_resolution.xy * u_scale);

    // Next lets get our colors
    vec3 highColor = rgb(u_highColor.r, u_highColor.g, u_highColor.b);
    vec3 lowColor = rgb(u_lowColor.r, u_lowColor.g, u_lowColor.b);

    // Set a random color
    vec3 color = vec3(23.0);

    // This is a randomised function based on fbm and some other variables
    // that we can adjust in our Javascript
    vec2 fbm1 = vec2(10.);
    fbm1.x = fbm( res + 0.05 * u_time) * snoise(res) * u_goCrazy;
    fbm1.y = fbm( res + vec2(3.0)) / (u_manipulate - snoise(res)) * 9. * u_goCrazy / u_veinDefinition * u_clickLength * 5.;

    // Next we adjust it all based on mouse position, time, and qfbm1
    vec2 r = vec2(0.);
    r.x = fbm( res + fbm1 * u_time * 0.1 ) + -sin(u_mouse.x) + 600.;
    r.y = fbm( res + fbm1 * u_time * 0.5 ) * -u_mouse.y;

    // And create a float of fbm, for use in the final color
    float f = fbm(res+r) * 1.;

    // Then we mix all our colors together
    color = mix(highColor*2., lowColor, f*3.);
    color = mix(color, lowColor, clamp(length(fbm1),0.0,2.0)); // * snoise(st) * 51.9
    color = mix(color, highColor, clamp(length(r.y),0.0,3.0));

    // And output them for render
    gl_FragColor = vec4((f*f*f*0.9*f*f+.5*f)*color,1.);
}
The cool thing about this particular fragment shader is that it renders as a cool noise effect for our demo, but if we increase the settings it can also double as a pretty simple liquid water fragment shader.
Our uniform variables are all defined at the top of the fragment shader but not listed above. They are listed in the form uniform float u_variableName;.
Step 3. Event Listeners
Finally, we add some typical event listeners to our code, to track mouse position, as well as the range selector positions. This allows us to adjust the effect and animate it as the user moves around.
This is perhaps the most straightfoward vanilla JS part. For the most part, we are simply updating the uniform variables through the mesh we defined before - mesh.material.uniforms.... When these are updated, our animate() function rerenders the new object in our HTML5 canvas, so our cursor position and interaction with the canvas has real time effects on the WebGL code.
    /* event listeners */
    document.getElementById('range').addEventListener('input', function(e) {
        // Update 'range' selector
        mesh.material.uniforms.u_manipulate.value = this.value;
    })
    document.getElementById('veins').addEventListener('input', function(e) {
        // Update 'veins' selector
        mesh.material.uniforms.u_veinDefinition.value = this.value;
    })
    document.getElementById('crazy').addEventListener('input', function(e) {
        // Update 'crazy' selector
        mesh.material.uniforms.u_goCrazy.value = this.value;
    })

    document.querySelectorAll('.color').forEach(function(item) {
        // Selector a color
        item.addEventListener('click', function(e) {
            let i = parseFloat(this.getAttribute('data-id'));
            mesh.material.uniforms.u_highColor.value = config.colors[i].high;
            mesh.material.uniforms.u_lowColor.value = config.colors[i].low;
        });
    });

    // Variables to track settings
    let reduceVector;
    let increasePressure;
    let reducePressure;
    let prevX = 0;
    let prevY = 0;
    let curValueX = 0;
    let curValueY = 0;
    let mouseEnterX = 0;
    let mouseEnterY = 0;

    // On move effect
    document.body.addEventListener('pointermove', function(e) {
        if(typeof reduceVector !== "undefined") {
            clearInterval(reduceVector);
            curValueX = 0;
            curValueY = 0;
        }
        let mouseMoveX = mouseEnterX - e.pageX;
        let mouseMoveY = mouseEnterY - e.pageY;
        mesh.material.uniforms.u_mouse.value = new THREE.Vector2(prevX + (mouseMoveX / elWidth), prevY + (mouseMoveY / elHeight));
    });

    // Animations on pointerdown and pointerup, using setInterval 60fps
    document.getElementById('canvas').addEventListener('pointerdown', function(e) {
        if(typeof reducePressure !== "undefined") clearInterval(reducePressure);
        increasePressure = setInterval(function() {
            if(mesh.material.uniforms.u_clickLength.value < 3) {
                mesh.material.uniforms.u_clickLength.value += 0.03;
            }
        },1000/60);
    });
    document.getElementById('canvas').addEventListener('pointerup', function(e) {
        if(typeof increasePressure !== "undefined") clearInterval(increasePressure);
        reducePressure = setInterval(function() {
            if(mesh.material.uniforms.u_clickLength.value > 1) {
                mesh.material.uniforms.u_clickLength.value -= 0.03;
            }
        },1000/60);
    });
Conclusion
And we're done. After that, we'll have most of the components needed to create the effect. Thanks for reading - you can find the resources including the full code for the effect below:
More Tips and Tricks for Javascript
- Web Components and the Shadow DOM
- How to Auto Generate Images with Node.JS and Canvas
- Asynchronous Operations in Javascript
- How to get the last element of an Array in Javascript
- Creating and Generating UUIDs with Javascript
- Javascript Array Concat Method
- Javascript Dates and How they Work
- How fetch works in Javascript
- How to Make Payments with the Javascript Payments API
- Javascript Records and Tuples