Websockets Tutorial: Creating a real-time Websocket Server
📣 Sponsor
A lot of the work we do with Javascript involves us sending information back and forth from servers. You are probably familiar with the concept of APIs, which send data to servers or websites in a particular format, to get a specific response back.
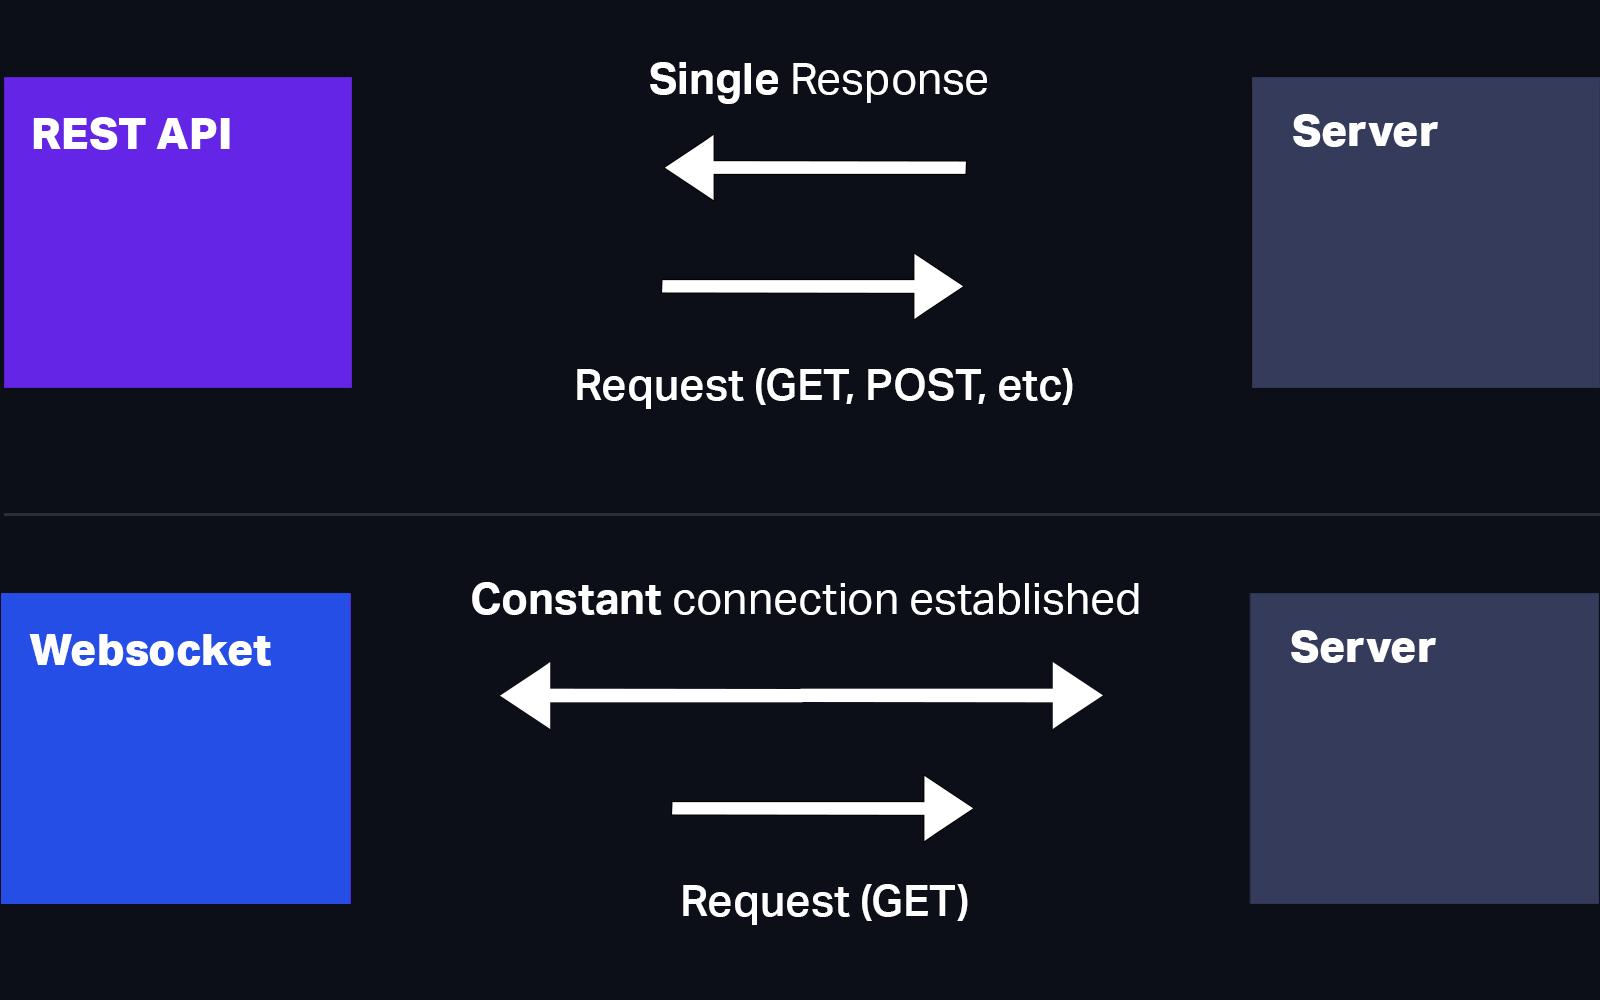
These are known as REST APIs. Although useful, they are not very good at constant streams of data. If you try to do something realtime with REST APIs, you're going to have a bad time. Fortunately, if we want a realtime connection with a user, we have an alternative, known as WebSockets.
How WebSockets work
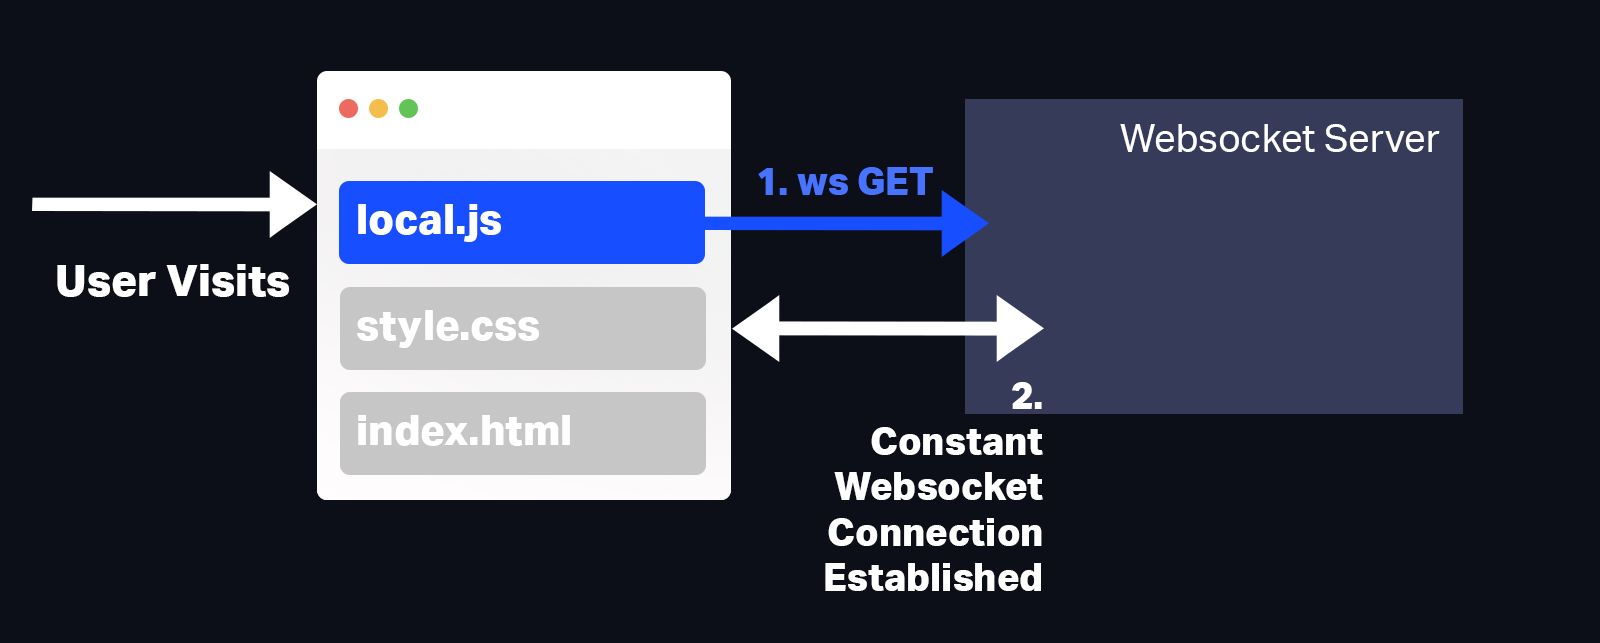
For this tutorial, we will assume you are familiar with Node.JS. WebSockets are essentially constant connections made between the server and your computer. When you access a website, it can send a GET request to the server, to initiate a WebSocket connection between the user and the server.
WebSocket vs REST API

If the user leaves the website, the connection is cut, so the user only has access to the WebSocket as long as they continue to use the website.
How long can a WebSocket stay open?
Once a WebSocket is created, it can theoretically stay open forever. There are a few exceptions to this:
- The server goes down - this will break the WebSocket, but we can attempt to reconnect to it.
- A power outage or internet connection problem - the connection will break if the user's internet stops.
- Inactivity - if the user doesn't interact or send data through the WebSocket, the connection inevitably times out.
As such, when we design our WebSocket, we need to consider how we reconnect to them if the user's connection stops for some reason, as to not interrupt the user's experience.
Making a WebSocket
A WebSocket therefore consists of two parts - the server, and the local machine that the user is using. For what we are doing, we'll be using Node.JS as our server, but other languages also support WebSockets.
When the user access our website, we load a file with some Javascript which contains a connection string to our WebSocket. Meanwhile, in our backend, we will have WebSocket set up that the user will connect to. This is shown in the below diagram:

Step 1: Creating our Server
Let's start by making our Node.JS web server for the WebSocket connection. For this, we're going to be using an express server with an additional package called express-ws. This additional package will allow us to use ws in the same way we might use get with express.
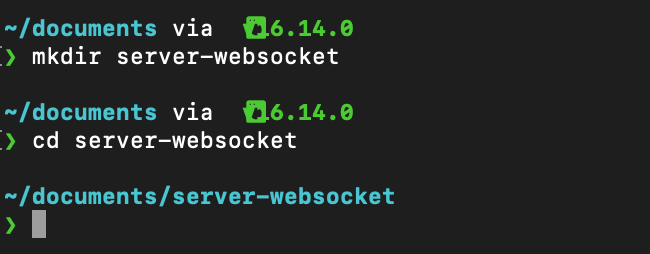
If you don't have Node.JS installed, you'll need to do that first by going to this link. Once installed, create a new folder called server-websocket. Open terminal, and use cd to move into that folder (if you don't know about cd, read our article on it here!).

Once in the folder, you need to install the dependency packages. Start installing your dependencies, by running each of the following commands:
npm i express
npm i express-ws
npm i path
npm i url
After that, make a file called index.js and put in the following code:
// Import path and url dependencies
import path from 'path'
import { fileURLToPath } from 'url'

// Get the directory and file path
const __filename = fileURLToPath(import.meta.url);
const __dirname = path.dirname(__filename);

// Import express, expressWs, and http
import express from 'express'
import expressWs from 'express-ws'
import http from 'http'

// Our port
let port = 3000;

// App and server
let app = express();
let server = http.createServer(app).listen(port);

// Apply expressWs
expressWs(app, server);

app.use(express.static(__dirname + '/views'));

// Get the route /
app.get('/', (req, res) => {
    res.status(200).send("Welcome to our app");
});

// This lets the server pick up the '/ws' WebSocket route
app.ws('/ws', async function(ws, req) {
    // After which we wait for a message and respond to it
    ws.on('message', async function(msg) {
        // If a message occurs, we'll console log it on the server
        console.log(msg);
        // Start listening for messages
    });
});
The last clause, app.ws, refers to the WebSocket, and that's what we'll try to connect to on the frontend. For the time being, the WebSocket only console logs a message, whenever it receives one from the frontend. Let's change that so it sends something back:
// Get the /ws WebSocket route
app.ws('/ws', async function(ws, req) {
    ws.on('message', async function(msg) {
        // What was the message?
        console.log(msg);
        // Send back some data
        ws.send(JSON.stringify({
            "append" : true,
            "returnText" : "I am using WebSockets!"
        }));
    });
});
Now whenever this WebSocket connection receives data, it will send back the object containing append and returnText. We'll also console log the message that the server has received.
We can then manipulate this object in our frontend, to display or change views for the user.
Save that file in your websocket-server folder as index.js. Then from your terminal, in the websocket-server folder, run the following command:
node index.js
Step 2: Connect on Frontend
Now we have a running websocket server, but no way to connect to it. We want to achieve something like this:
- A user visits our site.
- We initiate a WebSocket connection from our Javascript file.
- The user successfully connects to the WebSocket, and sends a message to the WebSocket once connected.
- We can then send data back to the user, now that they have a live connection to our WebSocket server, creating real time data exchange.
For our demo, let's start by making two files: index.html, and local.js, both of which will be front end files. Next, let's put the following in our index.html file:
<script src="local.js"></script>
<p>Welcome to WebSockets. Click here to start receiving messages.</p>
<button id="websocket-button">Click me</button>
<div id="websocket-returns"></div>
Next, we need to connect the user to our WebSocket, via the local.js file. Our local.js file will ultimately look like this:
// @connect
// Connect to the websocket
let socket;
// This will let us create a connection to our Server websocket.
// For this to work, your websocket needs to be running with node index.js
const connect = function() {
    // Return a promise, which will wait for the socket to open
    return new Promise((resolve, reject) => {
        // This calculates the link to the websocket.
        const socketProtocol = (window.location.protocol === 'https:' ? 'wss:' : 'ws:')
        const port = 3000;
        const socketUrl = `${socketProtocol}//${window.location.hostname}:${port}/ws/`

        // Define socket
        // If you are running your websocket on localhost, you can change
        // socketUrl to 'http://localhost:3000', as we are running our websocket
        // on port 3000 from the previous websocket code.
        socket = new WebSocket(socketUrl);

        // This will fire once the socket opens
        socket.onopen = (e) => {
            // Send a little test data, which we can use on the server if we want
            socket.send(JSON.stringify({ "loaded" : true }));
            // Resolve the promise - we are connected
            resolve();
        }

        // This will fire when the server sends the user a message
        socket.onmessage = (data) => {
            console.log(data);
            // Any data from the server can be manipulated here.
            let parsedData = JSON.parse(data.data);
            if(parsedData.append === true) {
                const newEl = document.createElement('p');
                newEl.textContent = parsedData.returnText;
                document.getElementById('websocket-returns').appendChild(newEl);
            }
        }

        // This will fire on error
        socket.onerror = (e) => {
            // Return an error if any occurs
            console.log(e);
            resolve();
            // Try to connect again
            connect();
        }
    });
}

// @isOpen
// check if a websocket is open
const isOpen = function(ws) {
    return ws.readyState === ws.OPEN
}

// When the document has loaded
document.addEventListener('DOMContentLoaded', function() {
    // Connect to the websocket
    connect();
    // And add our event listeners
    document.getElementById('websocket-button').addEventListener('click', function(e) {
        if(isOpen(socket)) {
            socket.send(JSON.stringify({
                "data" : "this is our data to send",
                "other" : "this can be in any format"
            }))
        }
    });
});
This might look like a lot, but let's break it down. In our connection function we start by constructing our WebSocket URL. This can simply be written as ws://localhost:3000/, since our WebSocket server runs on port 3000. Above, it is configured to adjust automatically should you be using HTTP or HTTPS.
We then pass some event listeners to our newly created WebSocket. All of our event listeners, and the URL to connect to the WebSocket server sit within our connect() function - the purpose of which is to connect to our WebSocket server.
Our WebSocket event listeners look like this:
socket.onopen- if the connection is successful and open, this fires.socket.onmessage- any time the server sends a message to us, this fires. In our example, we will append a new element to our user's HTML if they receive data which hasappendset totrue.socket.onerror- if the connection is fails, or an error occurs, this will fire.
Now that we have a connect() function which lets us connect to our Websocket server, we have to run it. We start by waiting for the page to load, using DOMContentLoaded. Then we connect to our websocket using the connect() function.
Finally, we attach an event listener to the button on our HTML page, which when clicked will now send some data to our WebSocket using the socket.send() function. When the server receives this data, it then sends back its own data, as the servers 'message' event will fire.
// When the document has loaded
document.addEventListener('DOMContentLoaded', function() {
    // Connect to the websocket
    connect();
    // And add our event listeners
    document.getElementById('websocket-button').addEventListener('click', function(e) {
        if(isOpen(socket)) {
            socket.send(JSON.stringify({
                "data" : "this is our data to send",
                "other" : "this can be in any format"
            }))
        }
    });
});
Since our onmessage event handler on our WebSocket fires whenever new data comes from the WebSocket server, clicking the button causes the WebSocket server to send a message back to us - thus creating a new HTML <p> element.
Conclusion
Now we have a functioning websocket, which allows you to send data to the server, and back to the user. This two way connection can be used to allow users to interact with the server itself, and even send data to other users, should you wish to. Here are some useful links to learn more about WebSocket:
More Tips and Tricks for Javascript
- Javascript on Click Confetti Effect
- Generating a Sitemap with Node.JS and Javascript Automatically
- How to do Everything with Javascript Arrays
- Creating and Generating UUIDs with Javascript
- Resolving HTTP Cannot set headers after they are sent to the client in Node.JS
- How the Javascript History API Works
- Javascript Records and Tuples
- Making your own Express Middleware
- Javascript Dates and How they Work
- How JSON works in Javascript