The Complete Beginners Guide to Getting Started with Git
📣 Sponsor
Git can be daunting to understand since it is completely driven from the terminal, but at its core it’s just version management software. It lets us maintain versions of code, which other people can contribute to. In this guide we’ll be looking at how you can quickly master the basics of git, so you can start your software project. We’ll cover the following:
- Making a git project, and how
git initworks, - Details around
git init, such as whatgit init --baredoes. - The basics of git, like making a branch, committing changes
- Pushing your changes to GitHub.
- The difference between
git initandgit clone.
Making a project with Git
Before starting with git, make sure you have it installed. You can learn all about installing git here. After it’s installed, open a new terminal window, and navigate to whichever folder you want to use as your git project using the cd command. After that, it’s just a case of running the following command to start your git journey:
git init
If you want to create your git project within a particular folder, you can run it with a directory location too. For example, the following will create a folder called myProject and turn it into a git repository:
git init myProject
Now that you have a git project, you can start creating files within it. You might notice a folder called .git within your git repository. This is where things like change history, branches, and other details of your project are stored.
What does git init --bare do?
You may have seen the following command, too, if you’ve used git before:
git init --bare
Essentially, if you use git init, your directory will store information on local changes, and you can develop there. If you use git init --bare, you cannot really develop in your directory. Instead, it is used as a storage place where other people can push their changes to. So you only really need to use git init --bare in circumstances where you are creating a repository in some place with the sole purpose of allowing others to push code changes to. For example, github would be an example of somewhere where git init --bare would be useful.
For most projects, you’ll start with git init.
Using git init to change the branch name
When you use git init, it creates a branch called master. Branches are copies of code that allow us to work independently from the main code base, and revert back to it when we want. All git repositories have a main branch, usually called master. If you want to call it something else, you can use the -b option. For example, the below code creates a new git repository, where the main branch is called myBranch:
git init -b myBranch
Committing your changes on git
Now that you’ve got your git directory up and running you can start to make changes. Any changes you make - like creating files, modifying files, renaming files, or any other types of changes, will be tracked by git. When you have made a set number of changes, we can commit our changes to create a snapshot of what we’ve done so far. This will be stored by git as a version of the project that git wil remember.
Suppos you’ve just created a file called file.md in your git repository. First, we need to add it to our commit. To add everything we’ve done so far to our commit, we write git add with the -A option, which adds all changed files to our staging area, ready to be committed:
git add -A
You can also add individual files to staging, if you don’t want to commit everything. To do that, you run git add with just the file name. For example, here I will only stage file.md:
git add file.md
Now we can commit our changes using git commit. When we commit, we have to leave a message to tell people what this commit was about, should they want to know in the future. The easiest way to do this is with the -m option, which lets you add a message to your commit:
git commit -m "My first commit!"
Commits are useful in git, since they provide a history of all the changes you’ve ever made. You can then recover a project at a certain commit. You can learn more about recovering a commit in my article here.
Viewing branches in git
Now that you’ve committed your first change, you’ll be able to see your branches. You can see all your branches by typing the following:
git branch --list
If you want to make a new branch, you can use git branch to create a new branch too. For example, the below will create a branch called newBranch
git branch newBranch
To switch to your new branch, use git switch:
git switch newBranch
When you create a new branch, it makes a copy of the code in that branch. When you switch to it, you can edit it, update it and commit to it - and it will only update that branch. When you switch back to your original branch, the code will remain the same as it was before you switched. Branches let you edit code in isolation, and then recover the original state if you need to. They also let you work on something while someone else is working on something totally different.
Pushing git changes to Github
Typically, we use git because we want to share projects with others, and track our change history. The most popular way to share code is GitHub. GitHub is just a website where you can commit and push your projects to, so that others can clone or contribute to them. When I talked about creating git init --bare earlier, GitHub is the perfect example - it is a place where we push code, but we don’t work on the copy of the code stored in GitHub directly.
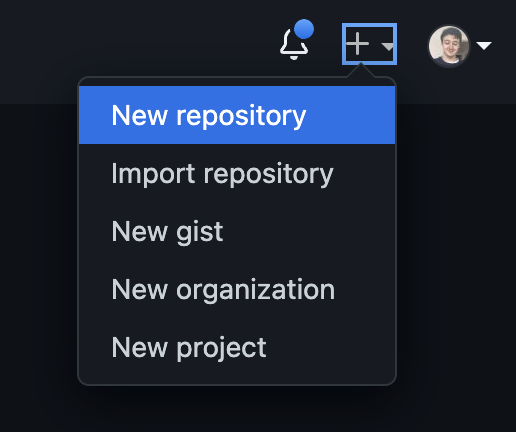
Instead we work on local copies which we push up to GitHub. To get started with GitHub, you need to make an account, and then click on the + to create a new repository:

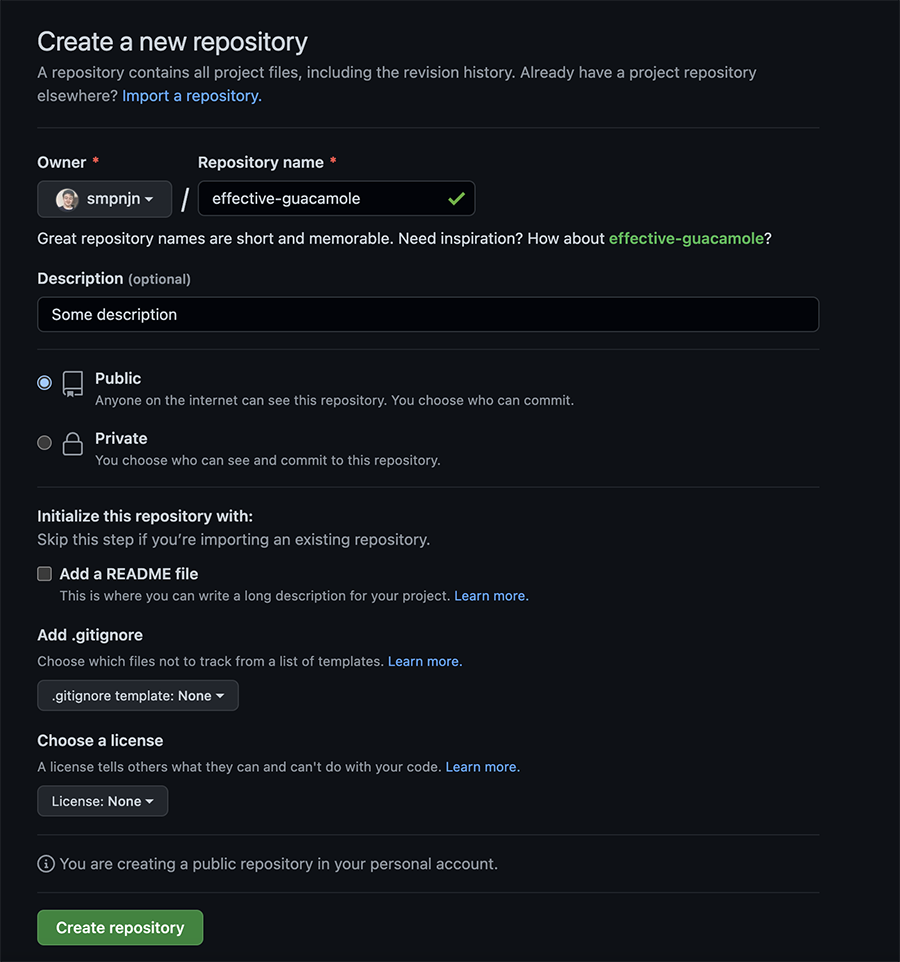
Fill out your repository information - you can call it anything you like. Here’s one I made:

Now that our repository is created, make sure you have committed all your code like we did earlier on your local computer. You can do that again by using the following commands:
git add -A
git commit -m "My first commit!
In git, there is the concept of a remote repository. This is basically where we want to be able to push code to when we need to. When you create your first repository, git will provide some instructions, but for my example, I ran the following code in my git project to add the remote URL to my local git configuration. Your URL will be different, but it will be in the format https://github.com/USERNAME/GIT_PROJECT.git
git remote add origin https://github.com/smpnjn/effective-guacamole.git
Above, we labelled our remote branch as origin, but you could change this in theory. Git uses the branch main instead of master - so it is recommended you run the following command to rename your current branch to main:
git branch -M main
We are almost there! Now we can finally push our changes to GitHub. To do that, you have to run the following command.
git push -u origin main
We use the -u option (which means set upstream), since it will link the remote repository we labelled as origin to our main branch. That means whenever we are on our main branch locally, by default any git push will push directly to our GitHub repository origin. That saves us a little effort when we want to push changes to our GitHub repository.
Now your project will appear on GitHub when you refresh! Pretty cool, right?
## Pushing future changes to GitHub
Now that you have your GitHub projects, you will probably continue to make some changes on your project locally. Whenever you are ready to push your changes to GitHub again, follow the same process. First, add all your files to staging, and commit them:
git add -A
git commit -m "My newest commit"
And then run git push:
git push
When you commit a change locally, it will only be stored locally until you do git push, giving you some flexibility on version management.
Conclusion
I hope you’ve enjoyed this guide to getting started with Git. Git can be a bit daunting at first, but it’s ubiquitous in programming now, so knowing it is vital. It’s also a great software management tool, which you will learn to love, especially when you accidentally delete a critical file 😉.
More Tips and Tricks for Git
- How to move your Githooks to your Repo
- Git Merge: Merging Changes from other Branches
- A Step by Step Guide to Git Branches
- How to make Git ignore file permission (chmod) changes
- How to add a Blank Directory to your Git Repository
- Git: Renaming a Branch
- How to amend and update a git commit
- Setting upstream with Git
- Git Stash - Everything about stashing changes in git
- How to make Git forget a tracked file now in .gitignore